

How To Test Sftp In Windows
Transferring files over a network is pretty mutual in this globe. Some practice it without knowing that they are sharing said data while others accept a defended server configured for the mentioned purpose. SFTP or Secure File Transfer Protocol is now preferred over the standard FTP or File Transfer Protocol considering of the SSH encryption that comes alongside it. If y'all have used FTP, you lot would know that the data involved during the transfer such as the usernames, passwords and more are shared through obviously text. This would be a nightmare for network admins to deal with just thankfully, there are now dissimilar versions available such every bit FTPS and SFTP as mentioned in a higher place.
One of the reasons yous might observe people preferring FTP is that information technology does not have a file size limit on the files that are to be transferred. Having an SFTP server in your work network has to be 1 of the nigh important things as it gives y'all secure file transfers to both customer applications and the server. When it comes to setting up an FTP server still, things can get a picayune complicated due to the numerous options available on the internet. Fifty-fifty though there are many choices to choose from, SolarWinds stands on top as usual due to the loftier quality of their products like the NPM which lets you monitor your network performance along with many other things. The Serv-U FTP Server from SolarWinds is no different from the loftier standards of their products which is why nosotros will be using information technology in this article to setup and configure an SFTP server.
Install Serv-u FTP Server
In order to be able to configure your own SFTP server, yous will kickoff demand to install it naturally. To download the Serv-U FTP server, caput over to this link. Yous tin can either choose to download the complimentary trial by clicking the respective button or buy the production through the provided push button which we would highly recommend.
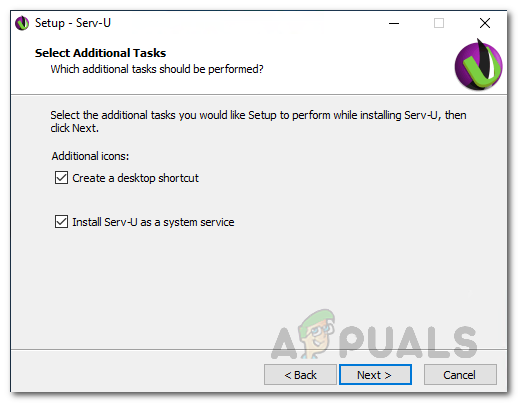
Whatsoever you decide on, you lot volition become a zippo file when the download finishes containing the installer. And then, get ahead and unzip and then run the installer. The installation process is rather uncomplicated and then simply follow through the on-screen prompts to get through information technology. During the setup, brand certain the Install Serv-U equally a organization service option is ticked. At the end, you will be asked to add together Serv-U as an exception, make certain the cheque is ticked and so click Next. Once you have done that, yous are done with the installation and have successfully got a SFTP server on your organisation.
Configuring Serv-U FTP Server
Now that nosotros have gone through the installation, it is time to configure the Serv-U FTP server. The procedure is pretty and user-friendly thanks to the Serv-U Management Panel. Follow through to configure the server.
Creating a Domain
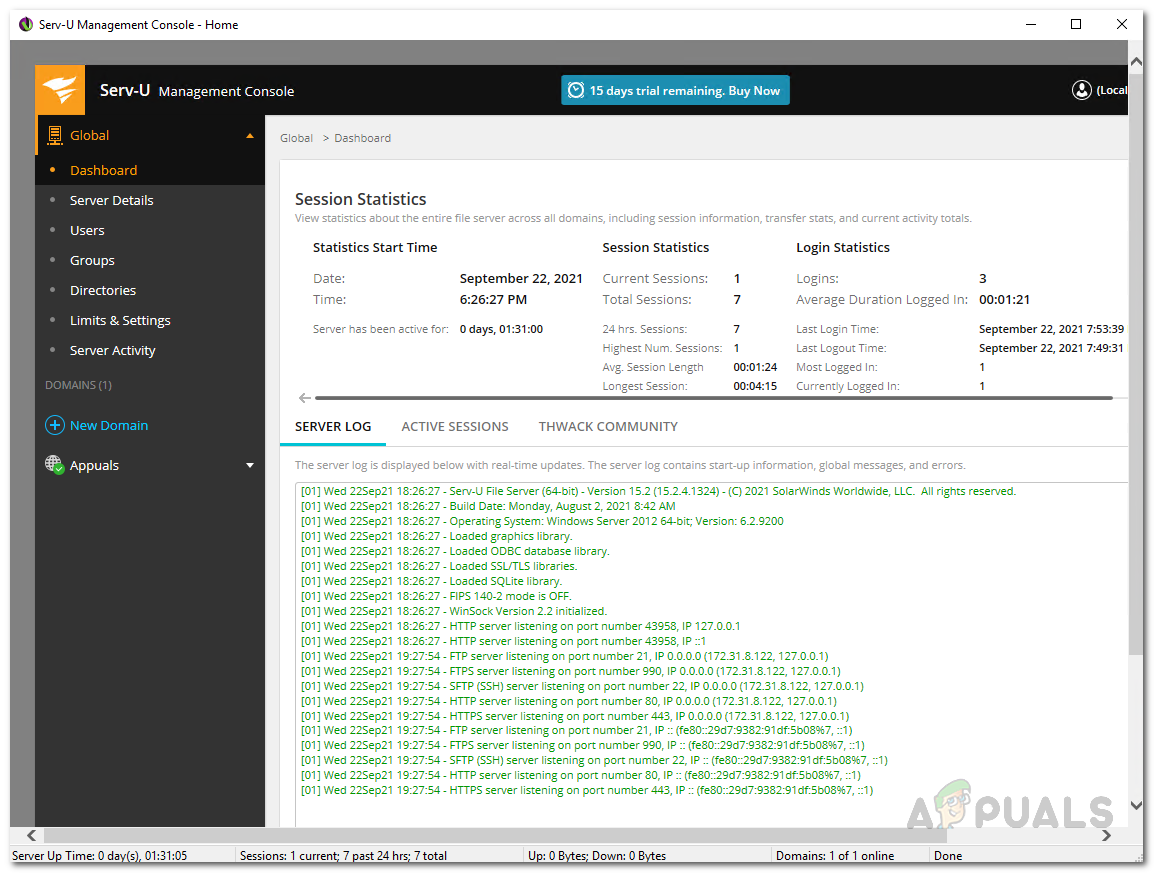
A domain is basically the core of the Serv-U server. For a layman, a Serv-U domain is essentially a number of listeners and user accounts that are basically allowed to connect to the SFTP server and access the files and folders. For further restriction and control, you tin can configure the domain created to restrict access based on IP address and even limit bandwidth usage so that the server performance remains optimal. With that said, creating a domain is really. Follow the instructions given down below:
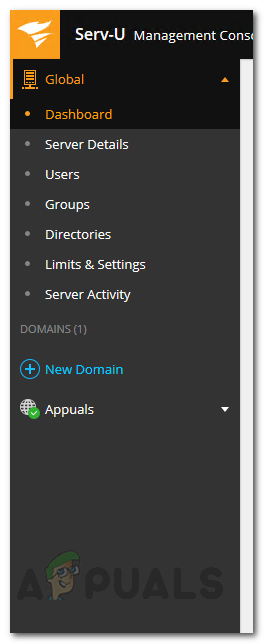
- Showtime of all, when you cease the setup wizard, the Serv-U Management Console should open up automatically. In case it doesn't, get ahead and open up the Start Carte du jour and search for it.
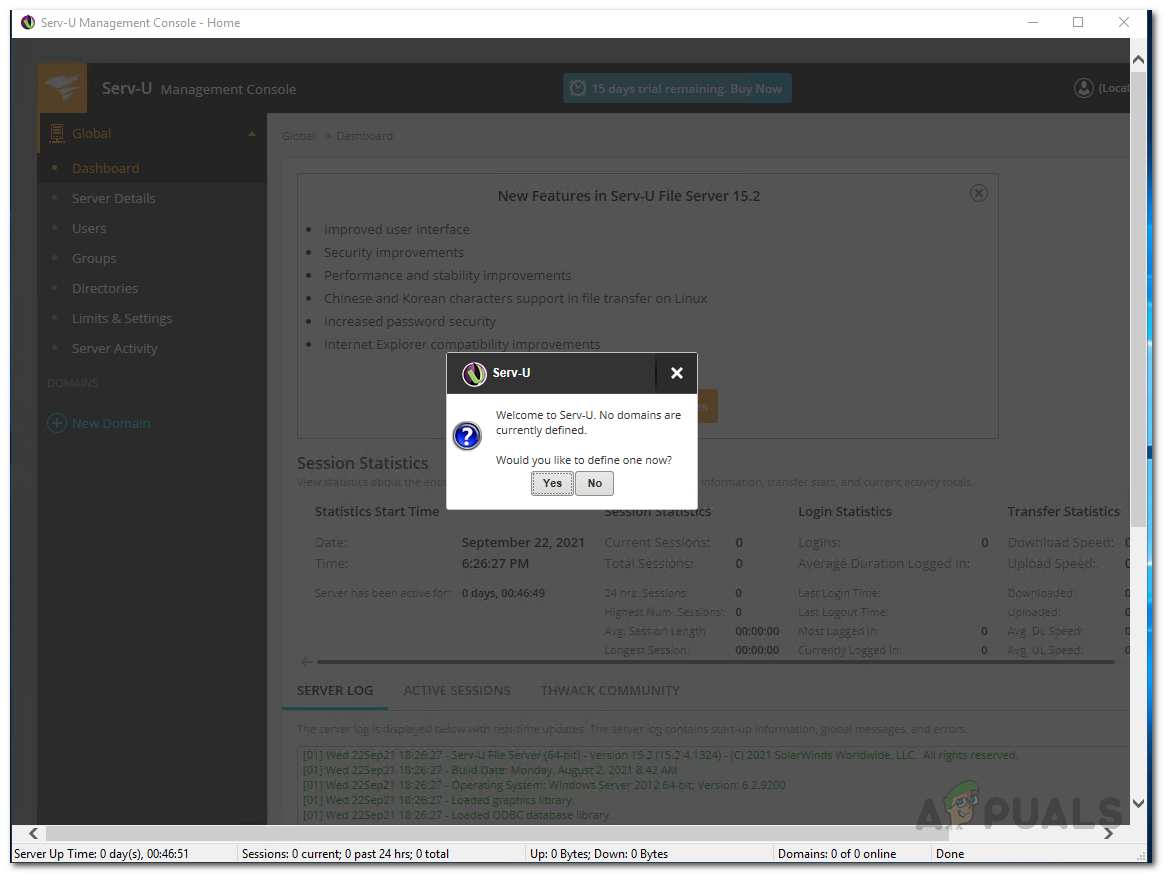
- When you open the management console for the start fourth dimension, you lot will be asked to ascertain a domain. Click on the Yep button.
Creating a New Domain - Alternatively, you can click the New Domain button on the left-hand side to define a domain.
New Domain Button - This will open up the Domain Wizard. First of all, requite the domain a proper noun and provide a description.

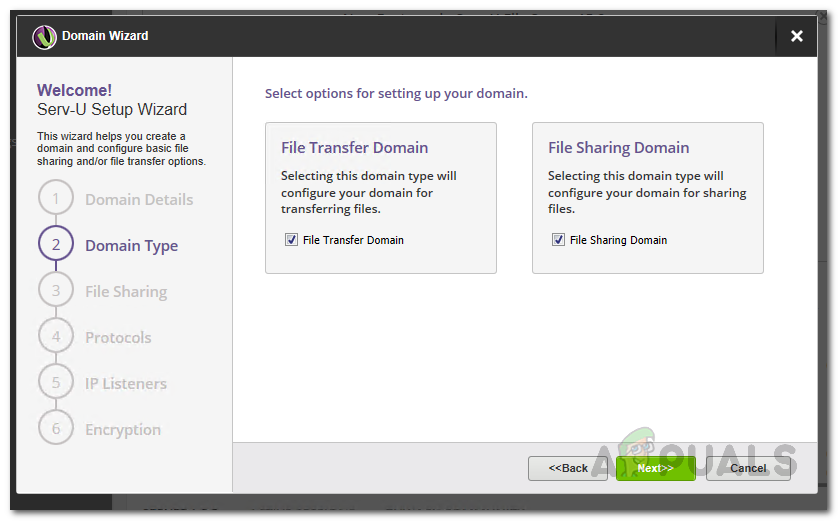
Providing Domain Details - On the Domain Blazon screen, choose what you lot want the domain to be used for i.e. file transfer or file sharing. Click Adjacent.
Choosing Domain Type - At present, if you choose the File Sharing choice, you will be taken to the File Sharing tab. Here, provide the domain URL that is to be used and and then follow it up by choosing the file sharing directory.
- If y'all wish to use HTTPS, make sure to tick the Use Secure URL checkbox.
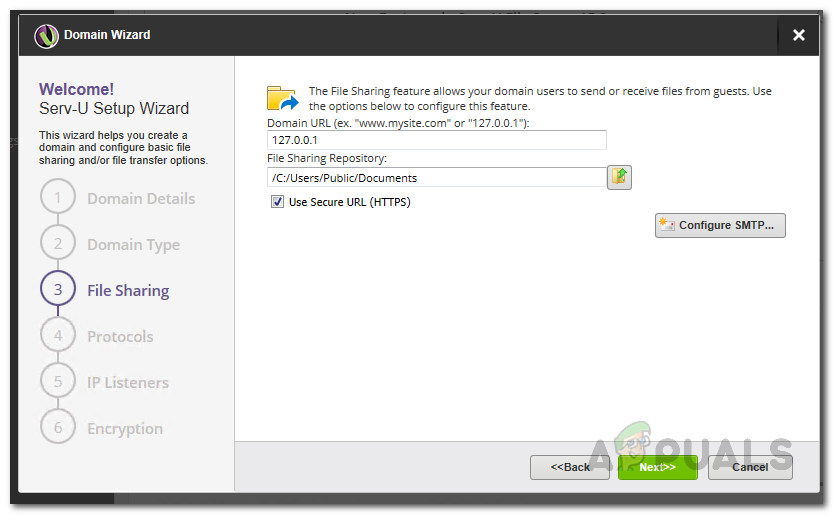
Irresolute File Sharing Settings - In add-on, if you lot desire the server to ship emails for electronic mail notifications as well as events that use email actions, click on the Configure SMTP push and provide the requested details.
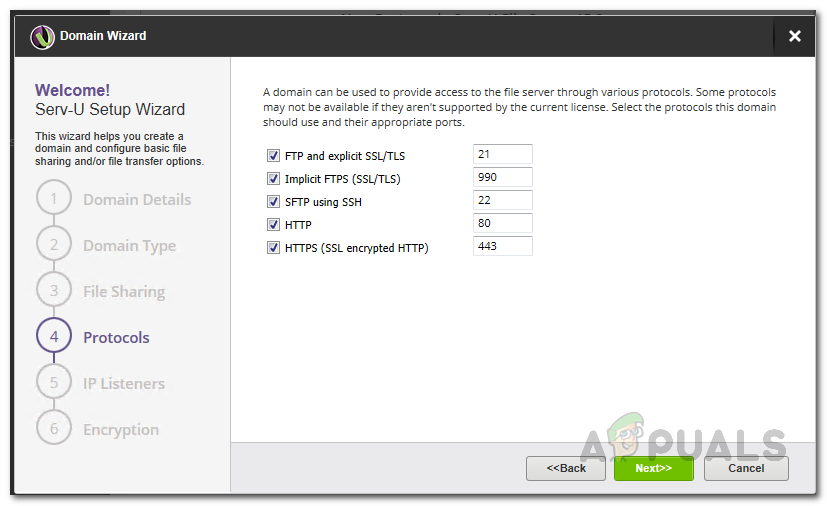
- In case y'all chose the File Transfer choice, you will exist seeing the Protocols screen instead. Here, choose the protocols to be used along with the respective ports. So, click Next.
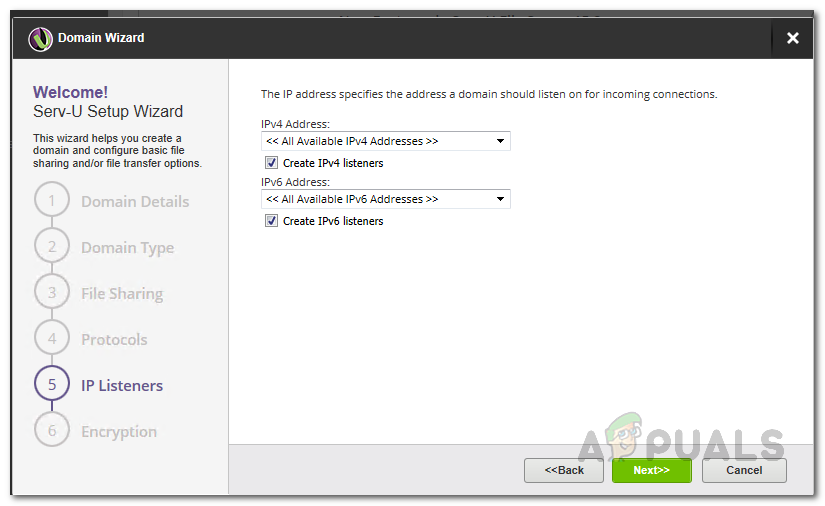
Choosing the Protocols for File Transfer - Past default, the SFTP server volition listen to connections on all available IPv4 and IPv6 addresses, yet, you can change this later on on via the Listeners tab that is located in the Domain Details folio.
SFTP Server Listeners - If you chose File Transfer, you lot can choose the password encryption fashion on the Encryption screen. In case y'all want to enable password recovery through the HTTP login page, tick the Allow users to recover passwords choice.
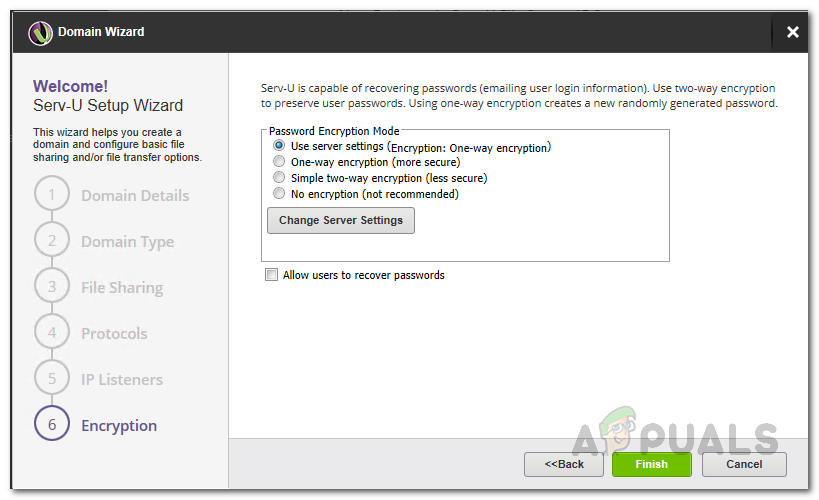
Choosing the Encryption Mode - Finally, once you have done all of that, click the Finish push button.
Create a User Business relationship
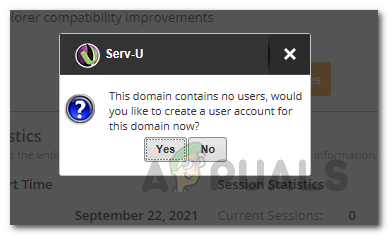
At present that we accept created a domain, it is basically useless if there are no created user accounts. Therefore, let us get started and create a user account that will be used to connect to the SFTP server.
- When you lot create your first domain, you should exist automatically prompted to create a user business relationship. Click the Yeah button. When asked to use the wizard, click the Yes button.
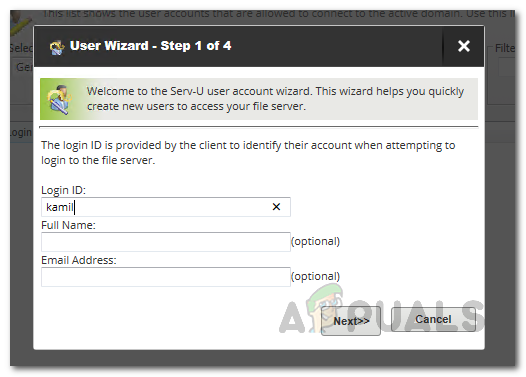
Creating a New User Account - Outset of all, provide the login ID of the user business relationship. Additionally, you tin can provide the proper name and email as well. Click Side by side.
Providing the Login Details - On the side by side screen, you will be asked to create a password. A password volition be generated automatically for you so y'all can choose to use that or create one on your own. In improver, if you want the user to change their password on their adjacent login, click the User must change password at next login checkbox. Click Side by side.

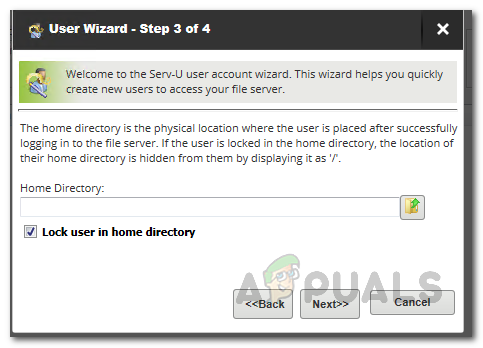
Changing the User Account Password - Then, you will accept to choose the home directory of the user. This is where the user will exist placed after they accept successfully logged in. Y'all can besides choose to lock the user to their home directory via the choice given. While providing the dwelling directory, you lot can use the %HOME% macro to insert the login ID to the path.
Providing the Home Directory of the User - Finally, on the final screen, you will be asked to choose the Admission Rights of the user.
- Requite the user Read Only Access if you desire him to exist able to scan and download files. On the other mitt, cull the Total Access option if you wish to grant the user full control of their files and folders in their home directory.
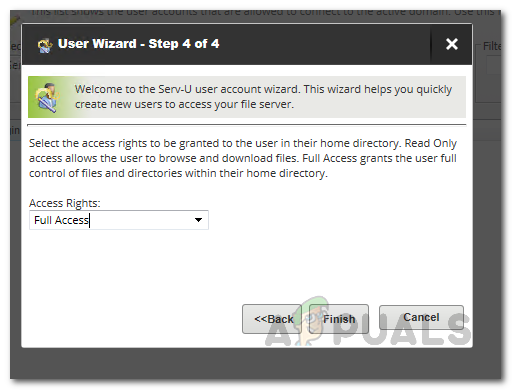
Choosing the User Access - Then, click the Finish push to add together the user.
- You can also add more users via the Add push provided on the Users page.
Connect to the SFTP Server from Windows Command Prompt
At this point, we have successfully created a custom domain besides as a user business relationship that nosotros can use to connect to the SFTP server. With the help of this, nosotros will be able to transport and receive files depending on the type of domain that you created. You can easily connect to the server via a Windows command prompt window. To connect to the Sftp Server from Windows Command prompt, follow the instructions given down below:
- First of all, open up up a command prompt window by searching for it in the Start Menu.
- In one case information technology is open, type in the following command to connect to your SFTP server. Make sure to replace the user and domain with your respective user account and domain proper noun. Once done, hit the Enter cardinal.
sftp user@domain
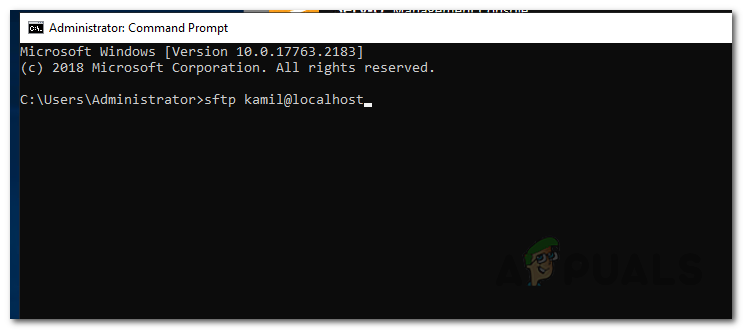
Connecting to the SFTP Server from Control Prompt - Later on doing that, you volition exist asked to enter the countersign of the user account. Provide the password that y'all created before during the User Account wizard.

Providing the User Password - Once you connect to the SFTP server, you will run across the prompt change to "sftp>".
- Now, to meet a list of all the commands bachelor, type in help and striking Enter.
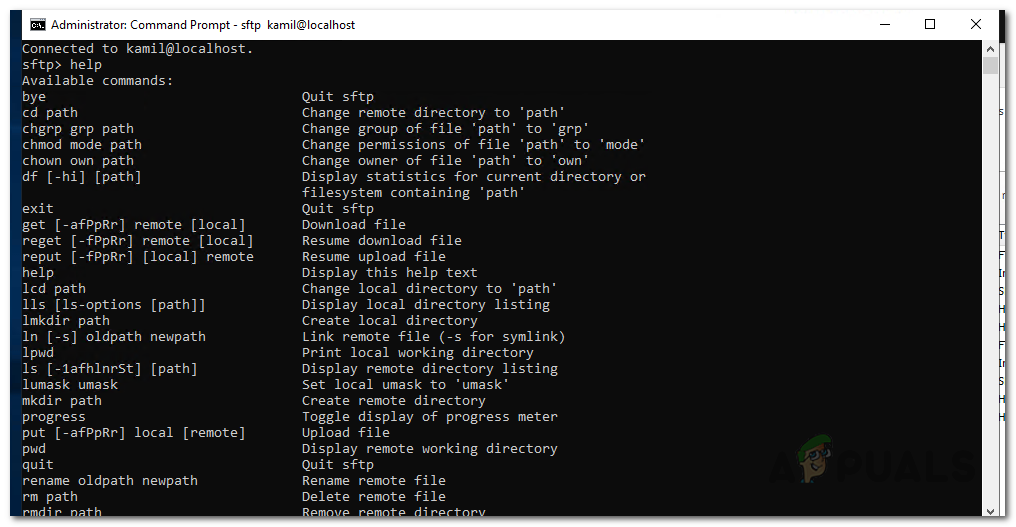
Available SFTP Commands - Yous can apply these commands to collaborate with the server, for example, to download a file, you lot can apply the get command.
![]()
Source: https://appuals.com/configure-and-connect-sftp-server-command-prompt/
Posted by: duplantislifehout.blogspot.com
0 Response to "How To Test Sftp In Windows"
Post a Comment